Short recap
-
Git commands are local-first
-
Commit often and write good commit messages
-
Be careful with commands that can permanently delete files
This section will mention branches, but will NOT explain them in any detail. Don’t panic! We will focus on them in the next section.
For now it is enough to know that branches are pointers to commits.
Remote Repositories
A remote repository is a independent version of the repository hosted somewhere else (like GitHub, GitLab, or Bitbucket).
It enables collaboration and serves as a backup.
Local vs Remote
Remote does NOT mean online
You can clone a local repository into another local directory.
The clone will have the original repo set as its origin remote.
This can be very useful for experimentation without requiring an internet connection or more complicated setups.
Common Online Hosting Services
- GitHub - Most popular, great for open source
- GitLab - Good for enterprise, built-in CI/CD
- Bitbucket - Integrates well with Atlassian tools
- Azure DevOps - Microsoft’s solution
- Self-hosted - Your own server
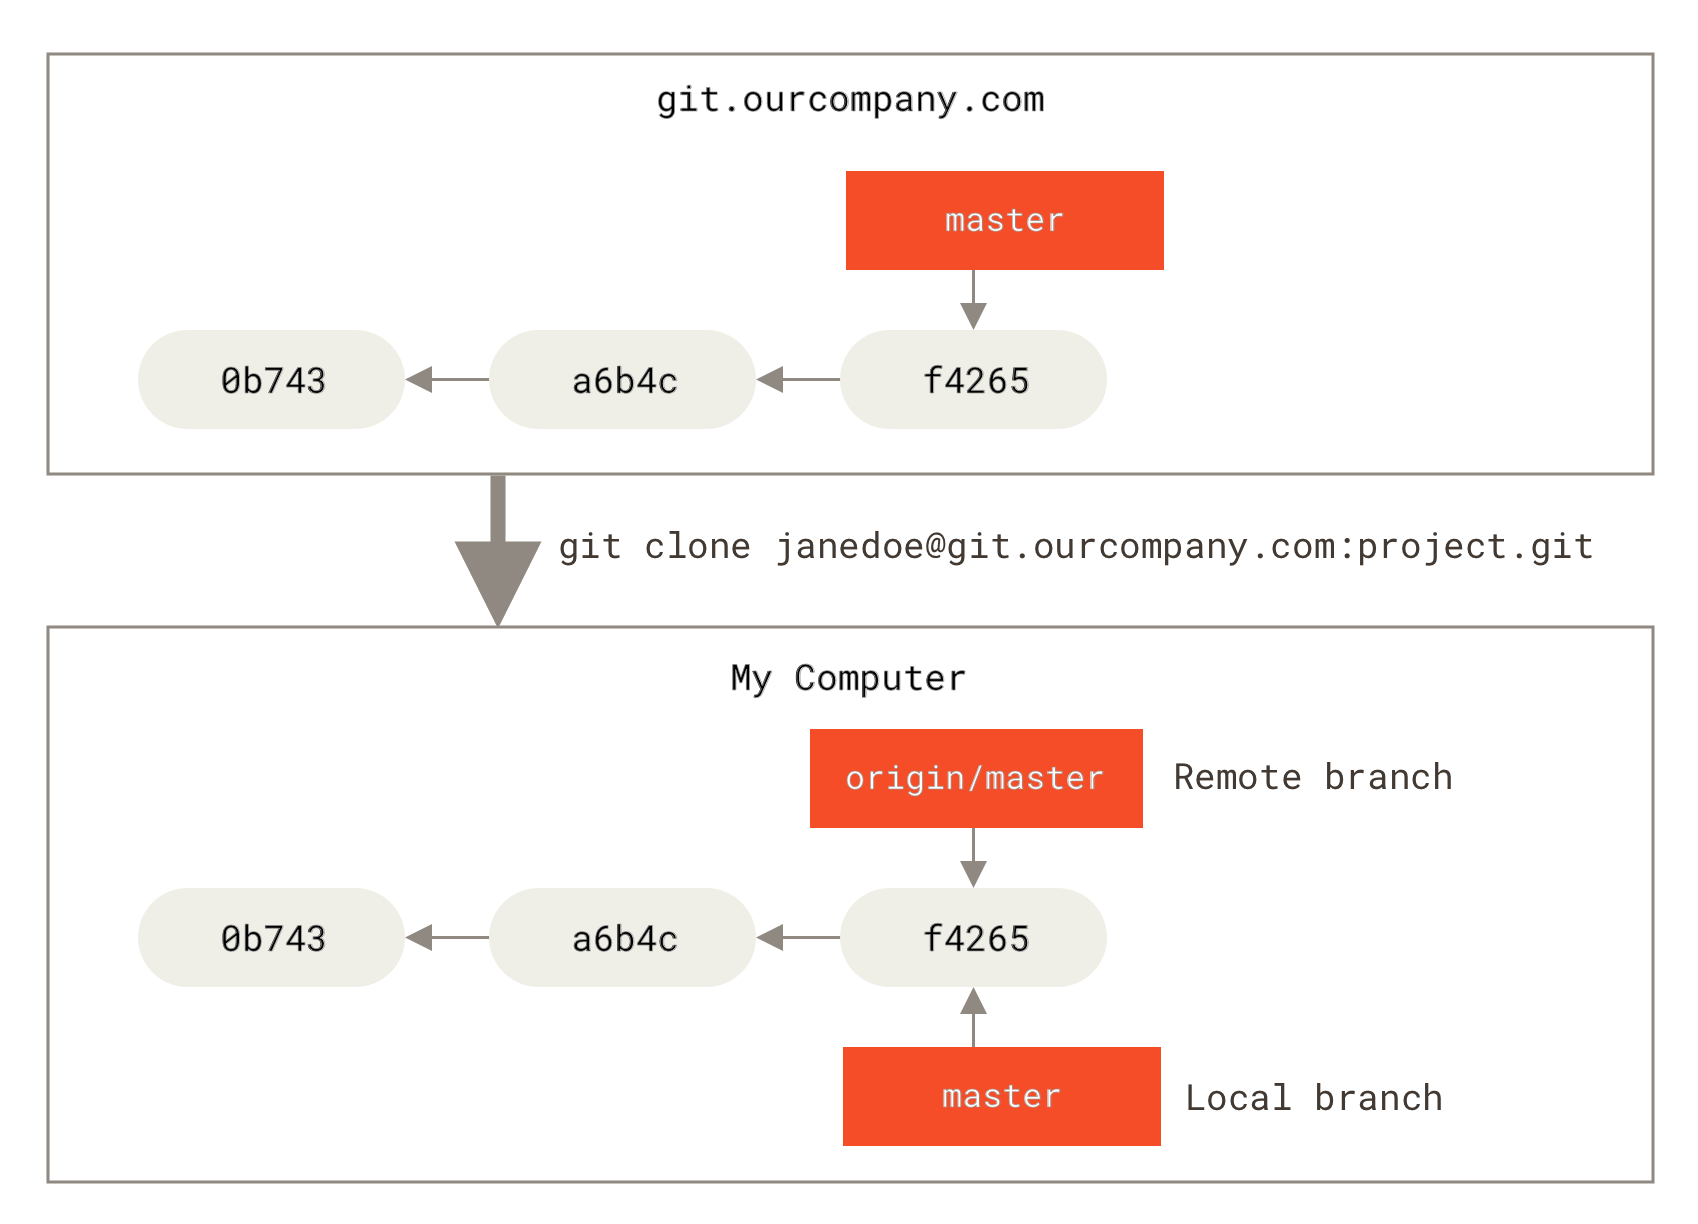
Cloning
The main way to start using remote repositories is by cloning.
Every time you clone a repository, your local copy has
the original set as a remote, usually called origin.
git clone https://github.com/user/repo.gitBy default git will clone into the current directory, creating a directory with the repository’s name.
You can provide a different local path:
git clone https://path/to/repo /path/to/local/cloneAdding a Remote
You can add any number of additional remotes:
# Add a remote repository
git remote add test-server ssh://user@host/srv/project

# List remotes
git remote -v

# Show detailed remote info
git remote show origin
Network protocols
Git supports a number of protocols:
- file (local)
- https
- ssh
- git (bespoke)
We will explore the specifics of these in a later section.
Common Remote Names
- origin - Default name for the remote repository that was cloned
- upstream - Often used for the original repository when you’ve forked
- fork - Sometimes used for your fork of someone else’s repository
Remote names are local to your repository, choose names that make sense for you.
Fetching and Pulling
# Download changes without modifying local files
git fetch

# Download and merge changes
# from a specific remote and branch
git pull origin main

# Pull with rebase instead of merge
git pull --rebase origin main
We will explore merging and rebasing in detail in the following sections.
Pushing to Remotes
Upload your local version of the repository’s history to a remote copy of the repository.
# Push current branch to remote
git push

# Push all branches
git push origin --all

# Push and set upstream tracking
git push -u origin feature-branch
You can push from any local branch into any remote branch.
# Push current branch (may be any)
# to the main branch on the remote
git push origin main
Multiple Remotes
# Add multiple remotes
git remote add upstream https://github.com/original/repo.git
git remote add fork https://github.com/yourfork/repo.git

# Push to specific remote
git push upstream main
git push fork feature-branch

# Fetch from all remotes
git fetch --all
Create your personal github.io page
- Create a repository on Github with the name
{username}.github.io - Clone this repository locally
- Create and commit an
index.htmlfile with some content - Push your changes to the remote repository
- Enable Github pages for your repository through the
Settingstab
Useful link: GitHub Pages Docs